
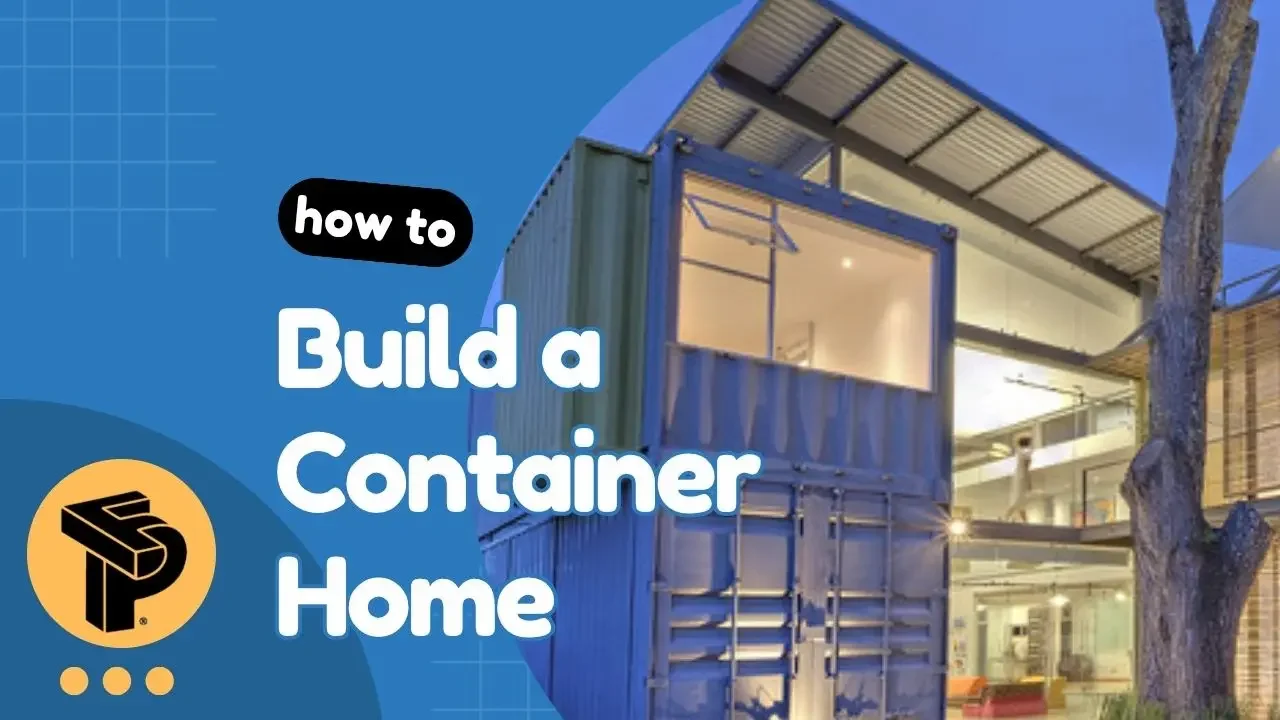
How to Build a Container Home: A Real Step-by-Step Guide
The question "how do I build a container home?" covers a significant range of ambition, from a single-container backyard studio assembled with YouTube guidance to a multi-container architect-designed residence built by a specialized fabrication team. The steps are similar in either case. What varies is who does the work, and how many times things need to be redone.
This guide covers the full process honestly, including the parts that get glossed over in most container home content. It also makes a case; where relevant for when the prefab manufacturing route makes more sense than self-building.
Before You Start: Two Paths to a Container Home
There are fundamentally two ways to build a container home:
Self-build / owner-managed construction. You source containers, hire contractors for specialized work (structural welding, electrical, plumbing), and manage the project yourself. Maximum control and potential cost savings if your skills and time allow. High risk of cost overruns and delays if they don't.
Prefab / factory-built. A manufacturer builds the home at their facility, fully or substantially finished, and ships it to your site for installation. You're buying a product with a known spec and a known price, rather than managing a construction project.
Both are legitimate paths. For buyers who want to be physically involved in building their home, self-build is the right choice. For buyers who want the result without the project management, prefab is faster, more predictable, and often — when you factor in mistakes and rework — not much more expensive than DIY.
Everything that follows applies primarily to the self-build path. For prefab, steps 1–4 happen at the factory; you're mainly responsible for steps 5–8.
Step 1: Design and Planning
Before buying a single container, you need a plan. Not a sketch. A proper set of drawings that show:
Container configuration (how many, what size, how arranged)
Structural modifications (window and door openings with header sizes)
Interior layout with room dimensions
Mechanical systems (electrical panel location, plumbing rough-in, HVAC)
Foundation type and connection details
For a simple single-container build, an experienced designer or drafter can produce these drawings. For anything involving multiple containers, structural modifications, or unusual configurations, a licensed architect or structural engineer is worth the fee, both for the quality of the design and because most building departments require stamped drawings from a licensed professional.
Budget $2,000–$8,000 for design and engineering documents on a single-container build; $5,000–$20,000 for a multi-container project.
Step 2: Permits
Submit your drawings to the local building department before buying or modifying containers. Getting permit approval before committing to materials and labor protects you from discovering partway through that the design needs revision to satisfy local code.
What building departments typically require for a container home permit:
Site plan showing the structure's placement, setbacks, and utilities
Architectural drawings showing floor plan, elevations, and sections
Structural engineering calculations and details
Energy code compliance documentation (insulation R-values, window specs)
Electrical, plumbing, and mechanical plans
Permit fees range from a few hundred dollars in rural counties to several thousand in urban jurisdictions. Plan review typically takes two to eight weeks. Some jurisdictions offer expedited review for an additional fee.
Don't skip this step or try to build first and permit after. Unpermitted structures create serious problems at sale, refinancing, and insurance — and in some jurisdictions trigger mandatory demolition orders.
Step 3: Site Preparation and Foundation
While permits are being reviewed, prepare your site. The foundation needs to be in place before the containers arrive.
Foundation options for container homes:
Concrete piers — the most common choice for single and small multi-container builds. Piers are poured at the four corners and mid-spans of each container, providing solid bearing points that correspond to the container's corner casting locations. Cost: $5,000–$15,000 depending on pier count and soil conditions.
Concrete slab — provides a full floor foundation and can simplify utility rough-in. Requires careful planning for utility penetration locations before the pour. Cost: $8,000–$25,000 depending on size.
Helical piles — steel screw piles driven into the ground, suitable for difficult soil conditions, slopes, and sites where conventional excavation is impractical. Cost: $8,000–$20,000.
Grade beams — continuous concrete beams connecting pier points, providing more uniform support for longer container runs. Used for multi-container configurations with cantilevered sections.
Also during this phase: rough-grade the site, establish delivery access for the crane and container truck, and install utility stub-outs (electrical conduit, water supply, sewer connection) in the foundation before concrete is poured.
Step 4: Container Sourcing and Inspection
Containers are purchased from container depots, shipping companies, or container brokers. Prices vary by location, size, condition, and market demand.
20-foot standard container: $2,500–$5,000 (used); $5,000–$8,000 (one-trip) 40-foot standard container: $3,500–$6,500 (used); $7,000–$12,000 (one-trip) 40-foot high cube: $4,000–$7,500 (used); $8,000–$13,000 (one-trip)
Inspect before purchasing. What to look for:
Structural integrity — check all four corners and the roof rails for dents, bends, or cracks. Cosmetic rust is acceptable; structural rust is not.
Floor condition — container floors are typically hardwood or bamboo. Check for soft spots, rot, or chemical staining. Many container floors are treated with pesticides for cargo protection, this needs to be addressed (replacement or encapsulation) before residential use.
Cargo history — ask for the container's CSC (Container Safety Convention) plate and shipping records. Avoid containers that carried hazardous chemicals.
Seal integrity — check that doors seal properly and the roof has no obvious penetrations that would allow water entry.
One-trip containers are significantly cleaner and more predictable than used cargo-grade containers, and the premium is usually worth it for residential use.
Step 5: Container Modification
This is the most technically demanding phase of a self-build container home project.
Cutting openings: Windows and doors require precise cuts in the container's steel walls. The preferred tool is a plasma cutter — it produces clean, accurate cuts with minimal heat distortion. An angle grinder with a cutting wheel works but is slower and less precise. Mark openings carefully before cutting; mistakes are expensive to repair.
Structural reinforcement: Every opening larger than a standard door requires a structural steel header above the cut to replace the load-carrying capacity of the removed wall section. Headers are typically C-channel or tube steel, welded to the container's framing rails. Under-engineer this step and the container can rack or buckle under load.
Corner casting modifications: For multi-container configurations, connecting containers requires careful alignment and typically steel connection plates welded between corner castings. This is structural work that directly affects the integrity of the assembled home, it needs to be engineered and executed precisely.
Surface preparation: Before insulation and cladding, address any rust on cut edges with wire brushing, rust converter, and primer. Weld splatter should be ground smooth.
Step 6: Insulation
The most consequential step for the home's long-term livability and energy performance. Steel conducts heat extremely well, which means an uninsulated container is either freezing or sweltering depending on the season. Getting insulation right is non-negotiable.
Closed-cell spray polyurethane foam (ccSPF) applied to the interior surface of the container walls, ceiling, and floor is the most effective approach. It combines insulation (R-6 to R-7 per inch), vapor barrier, and air sealing in a single application. A 3-inch application achieves approximately R-20; 4–5 inches gets to R-28+. This is your target for most US climates.
ccSPF requires professional equipment and careful application, it's not a DIY-friendly material. Budget $3–$6 per square foot of surface area for professional spray foam application.
Exterior continuous insulation — rigid foam board applied to the exterior surface, then covered with a cladding material — is an alternative that preserves interior width (critical in a container that's only 7'8" wide to start) and avoids the vapor drive issues that can occur with interior-only insulation in some climate zones.
The most thermally robust approach combines interior ccSPF and exterior continuous insulation, breaking the thermal bridge through the steel wall structure at both surfaces.
Step 7: Mechanical Systems Rough-In
With insulation in place, frame interior walls (typically 2x4 or light-gauge steel studs set against the insulated shell) and run mechanical systems:
Electrical: Container homes use standard residential electrical systems. The main consideration is that steel walls make running conduit easier than in wood-frame construction, conduit can be surface-mounted on the spray foam before framing, then covered by the interior wall finish.
Plumbing: Supply lines and drain pipes run through the floor framing or interior wall framing. For single-story container homes, plumbing is typically conventional PEX supply and ABS or PVC drain. Minimize run lengths by consolidating wet areas (kitchen, bathroom, laundry) in the floor plan.
HVAC: Mini-split heat pump systems are the most common choice for container homes — efficient, compact, require minimal ductwork, and can serve individual rooms or zones. A single 12,000–18,000 BTU mini-split handles a 20-foot container in most climates; a 40-footer typically needs two.
Step 8: Interior and Exterior Finishing
With mechanical rough-in complete and inspected, close up the walls with your chosen interior finish material (drywall is most common, though tongue-and-groove wood paneling works well with the industrial aesthetic of container construction).
Exterior cladding options: painted Corten steel (the original container surface, treated and coated), wood cladding (cedar, redwood, thermally modified wood), composite panels, stucco over rigid foam, or corrugated metal panels. Each has different maintenance requirements and cost profiles.
Flooring, cabinetry, fixtures, trim, and lighting follow the same process as any residential construction. The container's flat, level floor is one of the format's genuine advantages at this stage — no subfloor leveling required.
Step 9: Final Inspection and Occupancy
Schedule inspections with your building department at required stages — typically foundation, framing/structural, rough mechanical (electrical, plumbing, HVAC), and final. The final inspection results in a Certificate of Occupancy, which is your legal authorization to live in the home.
Timeline reality check: a competent owner-builder working steadily on a single-container home can realistically complete the process in six to twelve months. Multi-container projects typically take twelve to eighteen months or more.
The Honest Alternative: Prefab
If reading through those nine steps makes you want to hand the project to professionals, that's a rational response. Factory-built container homes like Prefahb's lineup handle steps 4–8 in a controlled manufacturing environment, with skilled tradespeople who've done this process hundreds of times.
The result arrives at your site in 8–16 weeks, ready to connect to utilities. You're responsible for the foundation, site prep, and utility connections — the parts that genuinely require local knowledge and local contractors.
For most buyers, the prefab route delivers a better-finished home in less total time with more predictable costs than owner-managed construction. The self-build path makes sense when the process itself is part of what you want, or when you have genuine construction skills that make the labor savings real rather than theoretical.
Explore Prefahb's container home models — built to spec, shipped to your site.